Rapid DApp Development Using Portis and React


This article will cover some of the user experience issues in current wallets, how the Portis wallet is working to solve them, and a technical walk-through on how to integrate Portis into your next application. If you've been in the Ethereum space for a while, you may have forgotten that web3 dApps have a fundamental difference from web2 apps: the separation of account and application.
On web2 applications such as Amazon, you have an Amazon account, and Amazon's infrastructure ensures your payment for your purchases. The application and the payment are handled by the same provider. However, due to the nature of blockchain, web3 apps are generally split into wallets and applications, with a single wallet communicating with any number of applications to facilitate payments with them.
Wallets can be confusing for first-time dApp (decentralized apps - applications that make transactions on the blockchain) users. Instead of being able to immediately use an application after setting up an account, users are required to install new software (a wallet) , set it up, manually connect it, and only then can they return to their initial task. This is not a criticism of wallets, nor of the wallet-app dichotomy, which makes a great deal of sense - It's merely an observation.
Portis: Focused on User Experience
Portis, a wallet acquired by ShapeShift, has put deep thought into making wallet setups as frictionless as possible. They've incorporated a number of innovations in order to bring as much of the convenience of the web2 model to the web3 ecosystem - enabling an easier starting point for new users. Some of the key highlights are:
Password login from any device - With most wallets on the market, if you set it up on one device, you can't easily log into it from another. While this setup may sound ideal from a purely security based POV, it can make accessibility a real issue. Portis solves this security vs. convenience dilemma by being semi-custodial. This innovative solution is both secure while also enabling users to access their accounts from any device with Portis installed using their password.
This hybrid keeps the security benefits of cryptography while creating a user flow similar to the standard email and password setup familiar to most retail users.
Frictionless dApp usage - Portis has made connecting to applications as seamless as possible by keeping a registry of dApps within their wallet. This enables the wallet to automatically connect to any listed dApp - a process that up until now had been entirely manual on other wallets.
Cross Platform & Browser Compatibility - Unlike most wallets, Portis is not a browser extension. While there is nothing intrinsically wrong with browser extensions, they often introduce compatibility issues and other complications. Portis is its own standalone app, and offers out-of-the-box cross-platform and cross-browser compatibility.
If you are interested in trying Portis out as a user, we encourage you to visit their site. The rest of the article will be a technical walk-through to help developers include Portis in their applications.
dApp Development With Portis
Project Setup
This isn't an article about setting up dApp projects, so we'll cover this briefly. We'll assume a stack of React (TypeScript) with web3.js, but this is meant as an example and can be extrapolated to other setups. (If you would like an easy path to setting up a blockchain React project, look into Austin Griffith's Scaffold-Eth. If you're interested in learning more, we have an article walking through deploying an ERC20 token using Scaffold-Eth.
Step 1 - Create your Project
As with all code orientated tutorials, we start by spinning up an empty react-app. At Linum Labs, we love types so we are going for this. Please run this in a new folder created for this tutorial:
%2013.09.50.png)
Next is to create some new folders in our src folder:
%2013.10.25.png)
src/services
Inside of services create a file called web3.ts:
%2013.10.32.png)
Leave this open and empty and let's move onto our next step.
Step 2 - Create a Portis DApp ID
Open a tab in your favorite browser and let's get ready to start some setup by navigating to the Portis dashboard.
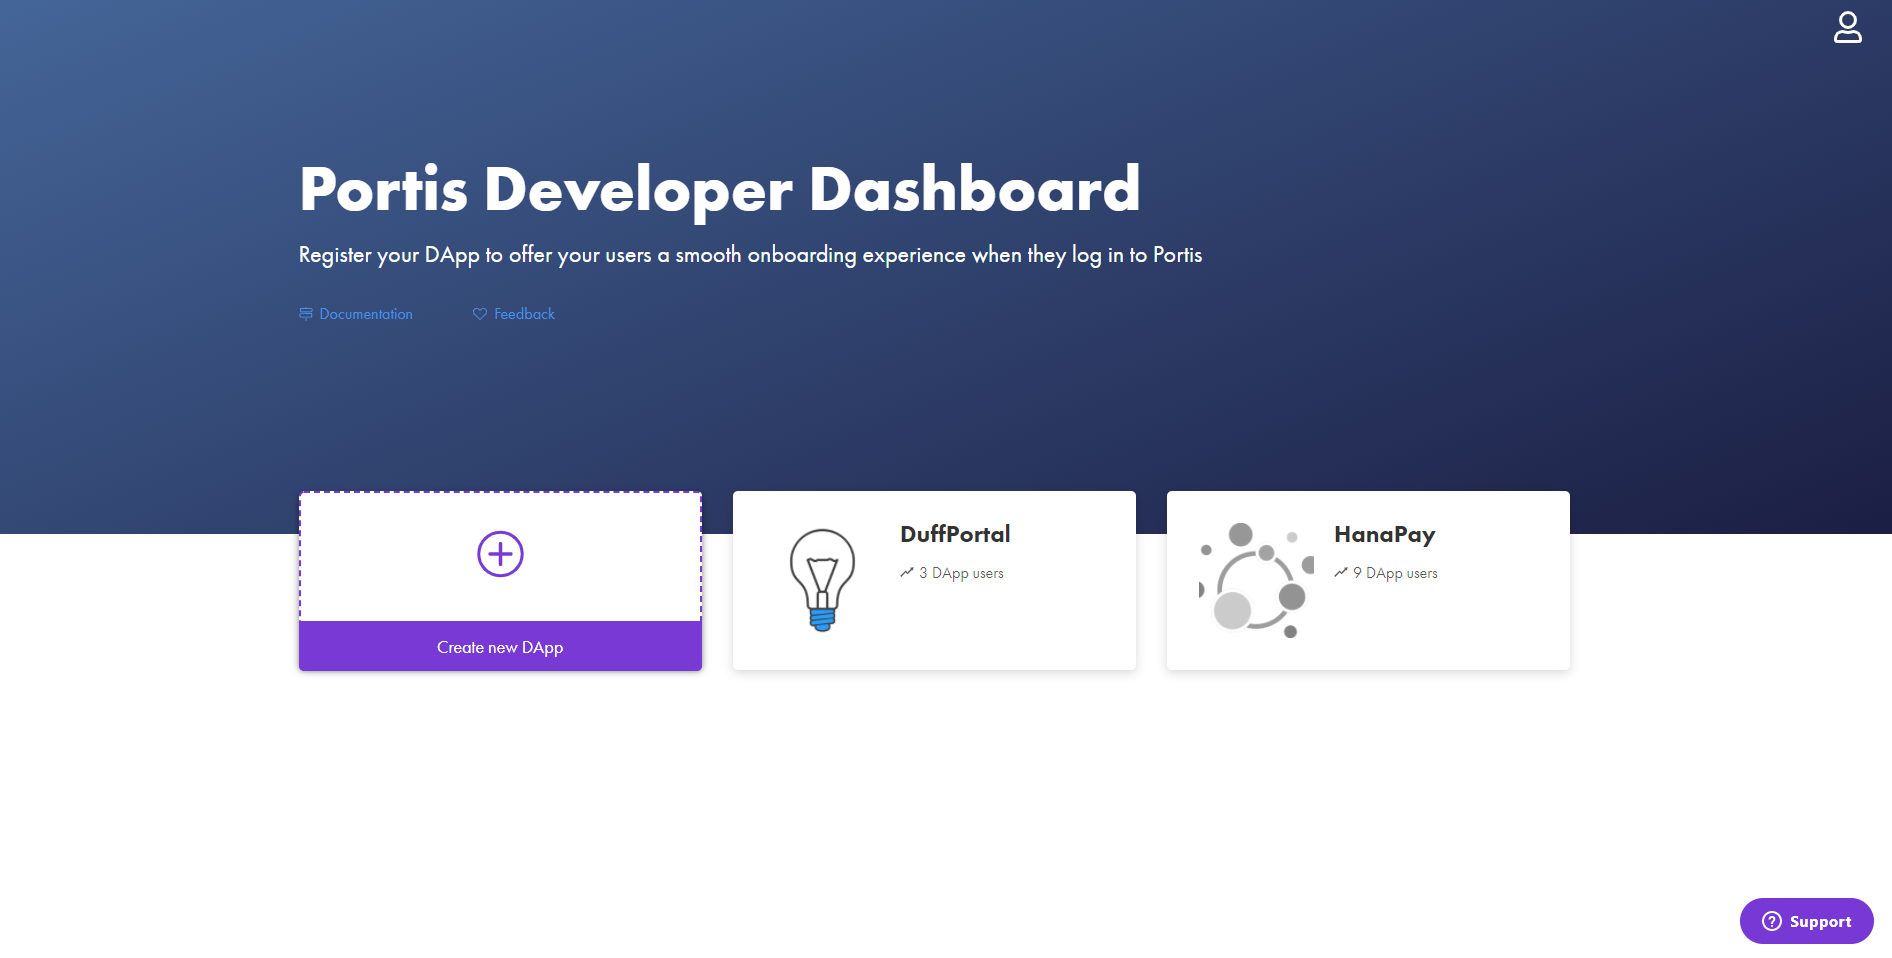
Nice and simple right? As all web3 DApps should feel!
Please create a new DApp!
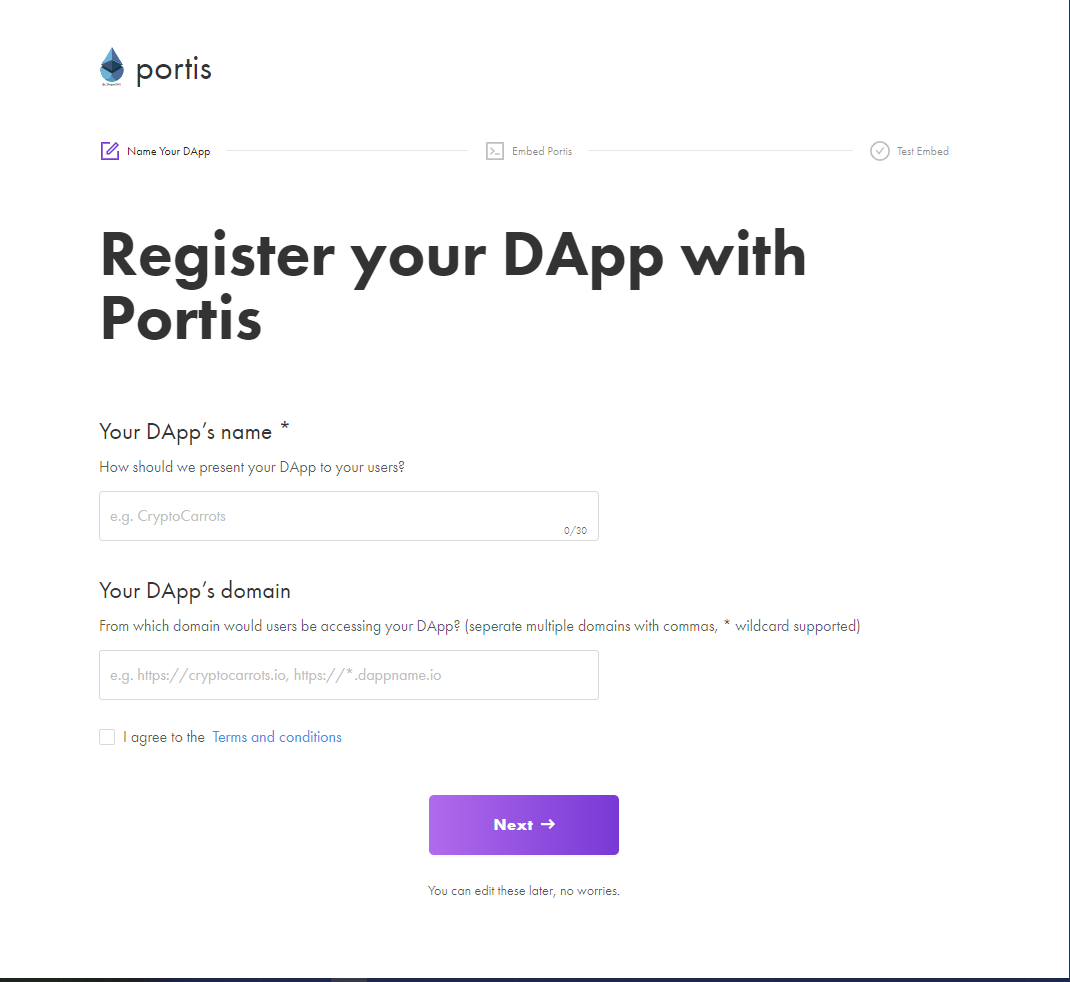
Fill out the details, these can be anything as we are just using this as a test. (Both my current DApps in the image are both working titles so please don't waste your time searching for these)
Onto the next step, we are ready to switch back to our code editor and open our recently created file web3.ts.
First, run this command in the root of the project:
%2013.13.42.png)
Then copy the code shown to embed Portis and let's export those constants. Your DApp ID should be displayed in the Portis Setup - please paste that instead of 'YOUR_DAPP_ID'.
%2013.14.09.png)
After this, we can navigate to our App.tsx and add the following call to web3 to get the connected accounts. This will allow us to test our embed and finish our setup on Portis.
%2013.14.35.png)
Now run the project with
%2013.15.03.png)
Once the project has started, you should see the Portis popup to continue to login to your Portis DApp through your Portis wallet. If you have not created a Portis wallet yet, you can do this now. It is as easy as using an email and password combination - but as with all wallets, please store your recovery code safely.
Login to your DApp with your Portis wallet and your DApp on the Portis setup should show it has been verified and completed.
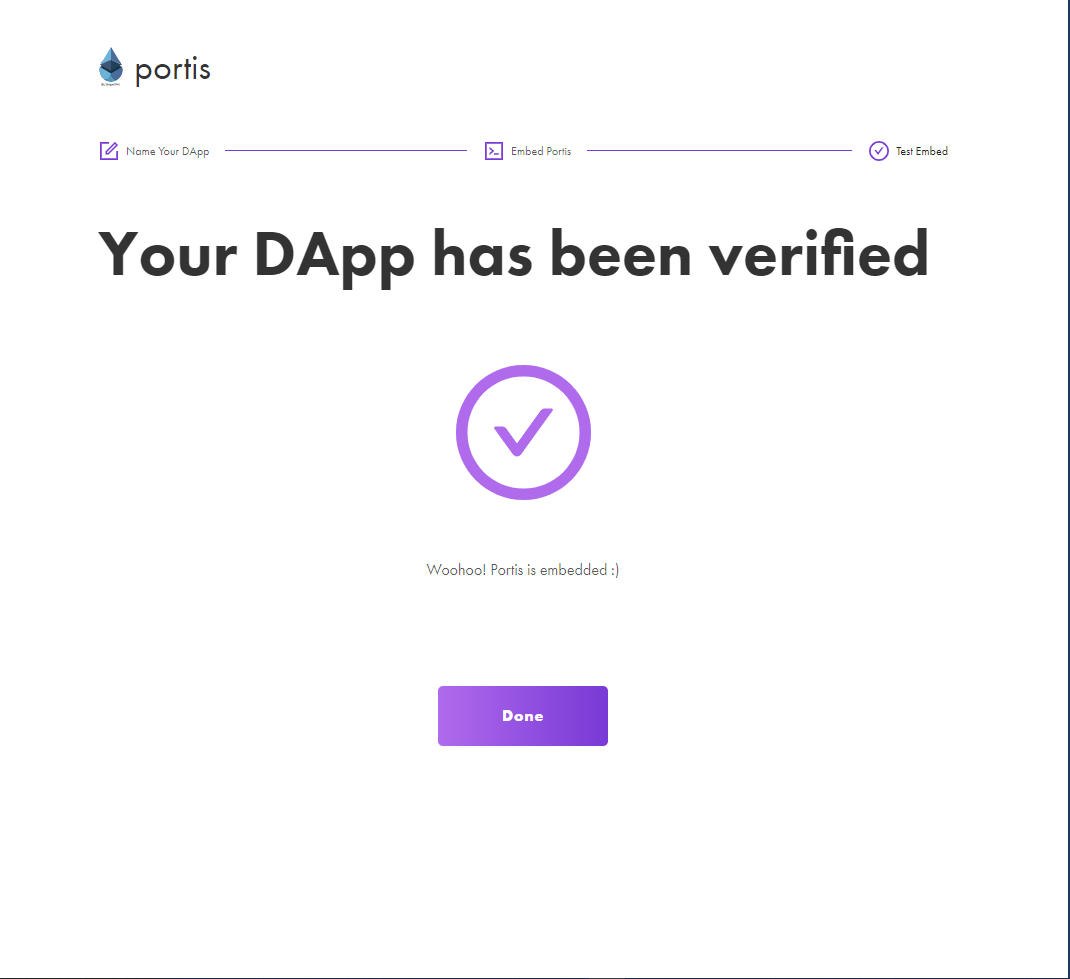
If we click done and navigate into our newly created DApp, we will see a few options. These are some of the great user experience perks that come with Portis.
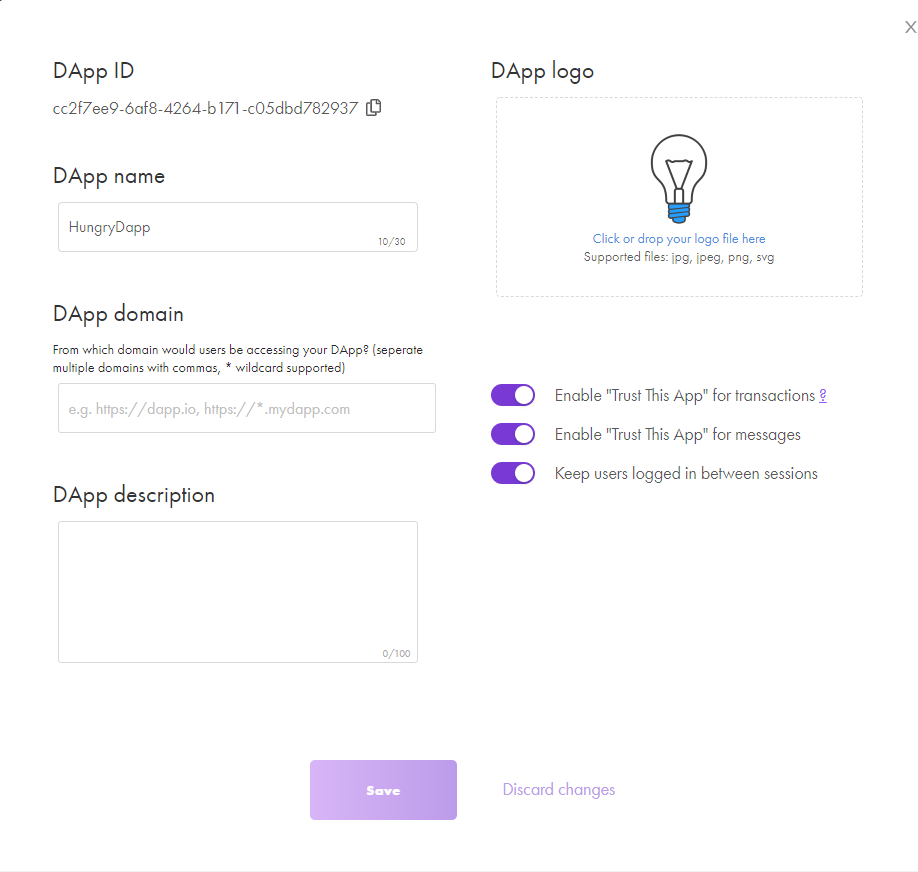
Enabling 'Trust this App for Transactions' means that the user can see a toggle on their next confirm transaction popup. If they choose this option, they will not have to manually confirm non-payable transactions or when signing messages. Instead, they see a popup saying that the transaction was confirmed for them.
Keeping the user logged on between sessions is also a great perk to have, as this allows for the user to just come back to your DApp without having to go through the login process again.
You are also able to customize the logo the user sees when they are asked to login, which helps the user know that they are logging into the correct DApp - plus it's always nice to have more options for branding!
Step 3 - Use OnLogin Event
Switching back to our code editor, we can now start to hook up our DApp to read the address and get the balance from the user that has logged in. Let's navigate to App.tsx and remove some of the boilerplate code.
Your App.tsx should look like this:
%2013.16.30.png)
Let's add in our initial state first and get our components created. Our initial state should be an object with an address and balance, and let's get our state setup in the App function.
%2013.16.56.png)
Now let's create two simple components in their own folders in our components folder.
First, let's create an Address component:
%2013.17.55.png)
And secondly, create a similar balance component that takes in an amount and a symbol.
%2013.18.18.png)
Import these into your App.tsx and put them inside the header tag with the appropriate properties filled by state.
You will see I am hardcoding the symbol for balance as "ETH".
%2013.18.46.png)
If you run your application now, it should display these with the initial state values. Now that we have everything ready, we can get stuck into the Portis event.
Portis has a few events that can be hooked onto which can be found in the Portis Methods & Event Handlers docs. We are mostly interested in the onLogin event for this guide, so let's look at that.
%2013.19.17.png)
So this will give us the user's eth wallet address, their email they used to login with and their reputation. We are not really concerned with the email or reputation for this guide, but these are REALLY powerful if you are needing to do Single Sign On and to do other verifications on email and reputation.
Let's move along and get that into our App.tsx.
%2013.19.50.png)
Here we are just logging the address, but we also need the balance of the user, particularly the ETH balance. Luckily, since we already set everything up in our imported web3.ts file, we just have to call web3.eth.getBalance with that address (Remember to format the value coming back as it is in Wei).
After we get this value, we can set both the address and the balance in one state change.
%2013.20.11.png)
And we are done! We call web3.eth.getbalance and wait until we have the response to format the value with the web3.utils method fromWei. The address is already a string so no formatting needed.
If you now run the project and log in with Portis, you will see that your wallet address and your ETH balance will be displayed.
Conclusion
We hope this article has helped demonstrate Portis' versatility and the ease of integrating it. We've used Portis internally for a number of dApps that we've built and are proud to be building a partnership with them.
If you need assistance integrating Portis into your next dApp, or assistance building the dApp, please feel free to book a complementary 30-min consultation with our team here.


.jpg)
